Working with Workflow Designer
This section describes how to use Workflow Designer to create or edit a workflow, and how to design the process and sub processes in the workflow. This section also contains information on where you can view a video demonstration of creating workflows.
Topics
Opening Workflow Designer
To open Workflow Designer
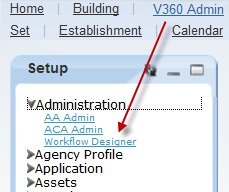
Navigate to the Administration portlet (see Navigating to the Setup).
From the Setup portlet, choose Administration > Workflow Designer.

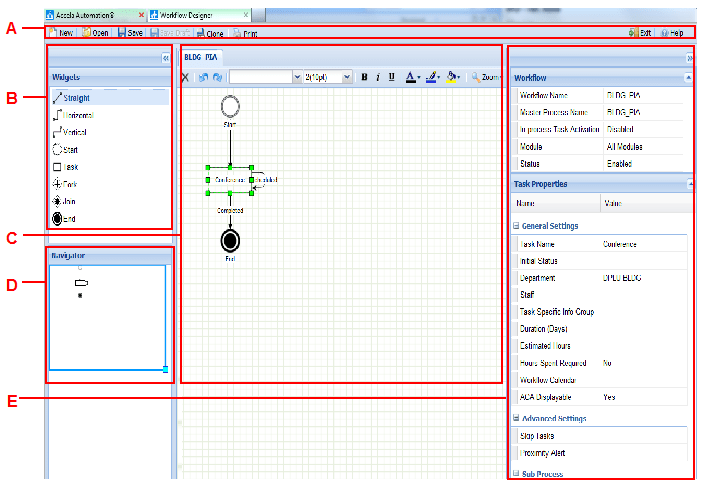
Figure 1 shows Workflow Designer displaying a sample workflow.
Figure: Sample Workflow

| A | Workflow Designer Menu. Displays the New, Open, Save, Save Draft, Clone, Print, Exit and Help buttons. |
| B | Widgets Panel. This panel provides all the available widgets that you can add to a workflow process. |
| C | Workspace. The central panel provides the canvas for you to design workflow processes and sub processes. Only one workflow process can be open at one time. If the workflow process has several sub processes, the sub processes display in individual tabs. |
| D | Navigator Panel. This panel displays a thumbnail view of the design panel. You can drag the border of the outline in the panel to quickly change the view of the design panel. |
| E | Property Sheet. This property sheet provides a list of properties directly related to the workflow process or sub process displayed in the workspace, and the property settings of the widget (if any) that currently has focus. |